Installation Instructions:
Stand-Alone Level Rail
Video Instructions
Written Installation Instructions
Here Are The Steps To Have A Quality Handrail Installed In About An Hour
stunning mature franny on a young cock. https://onlychicas.net la mia fidanzata mi fa una sega.
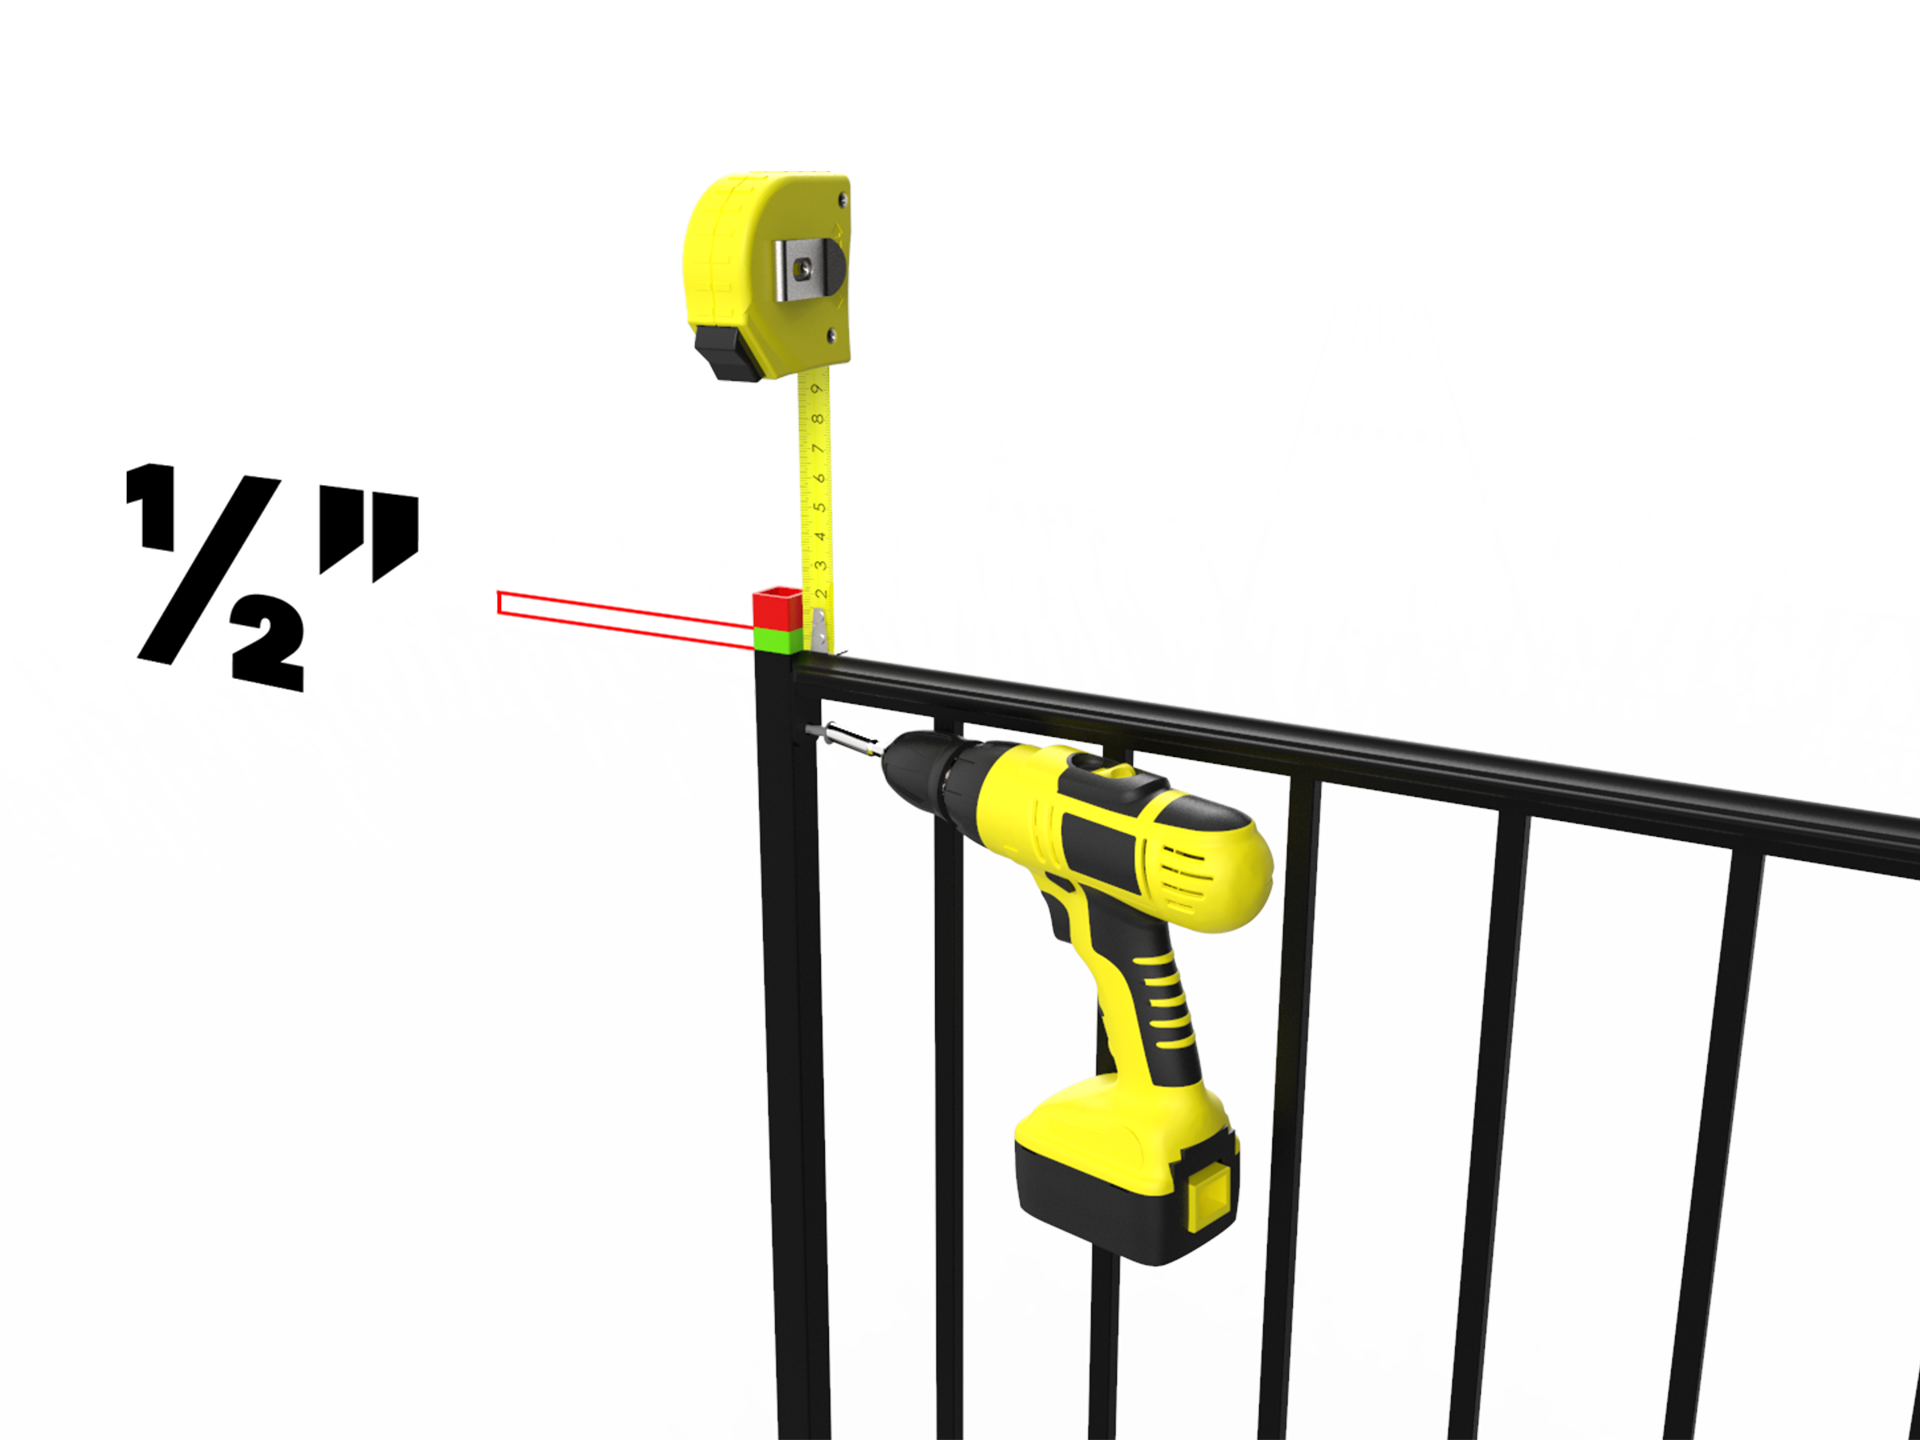
Measure ½” down from the top of each post and make a mark. If you desire to have a shorter rail, add a half inch to the desired height and make a cut. Place the top of the rail at the ½” mark and use the self drilling screws to fasten to each post.
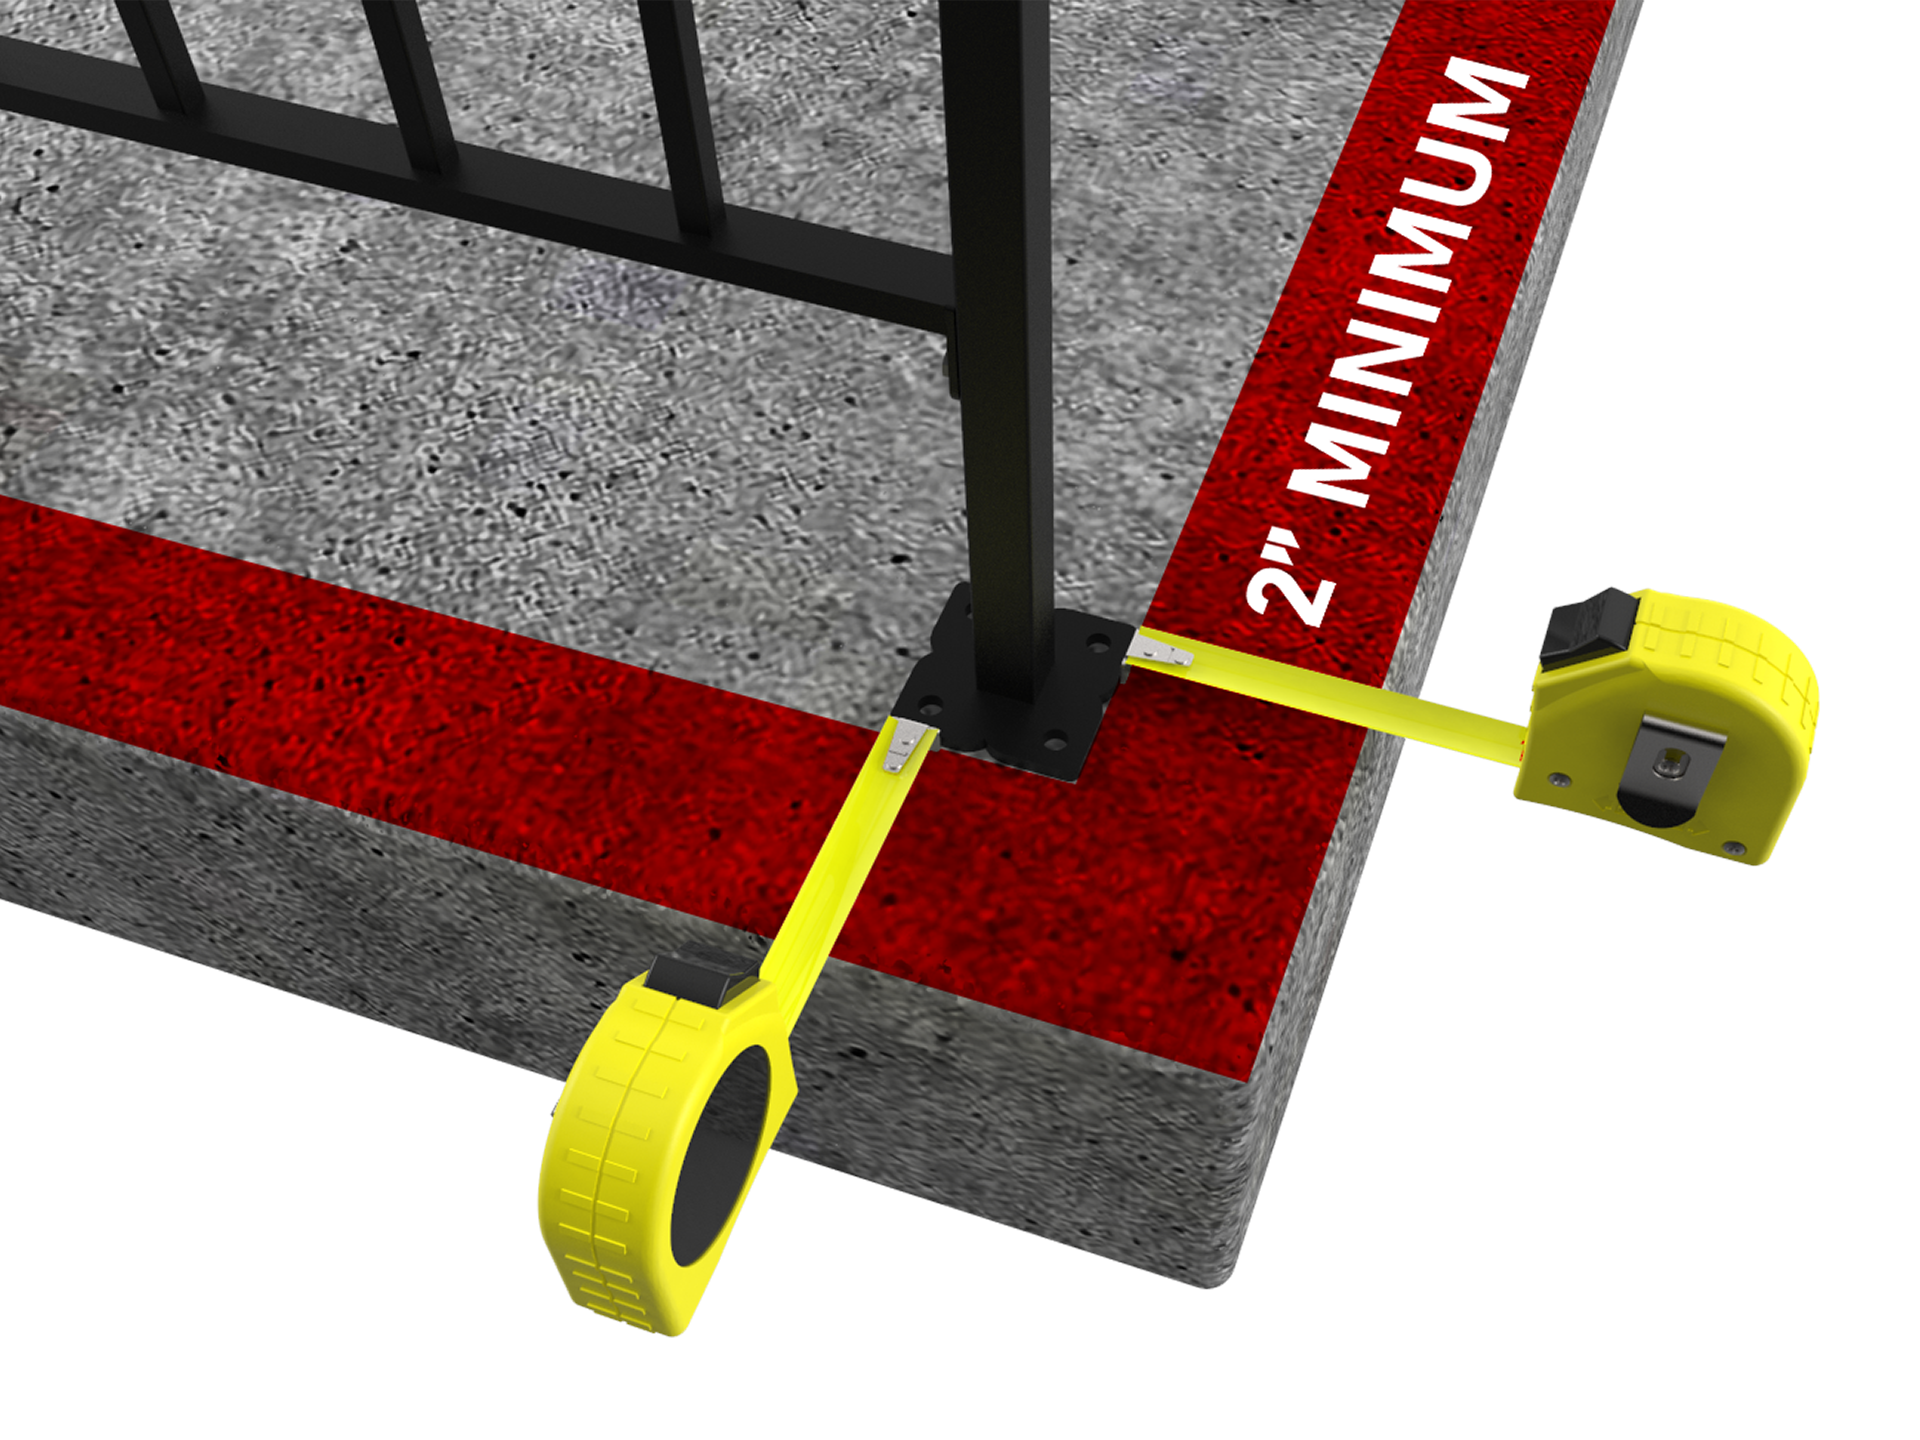
Place the assembled rail in the position where it is to be installed. Make sure the post base is sitting at least 2” from each side. Be sure to measure at both posts.
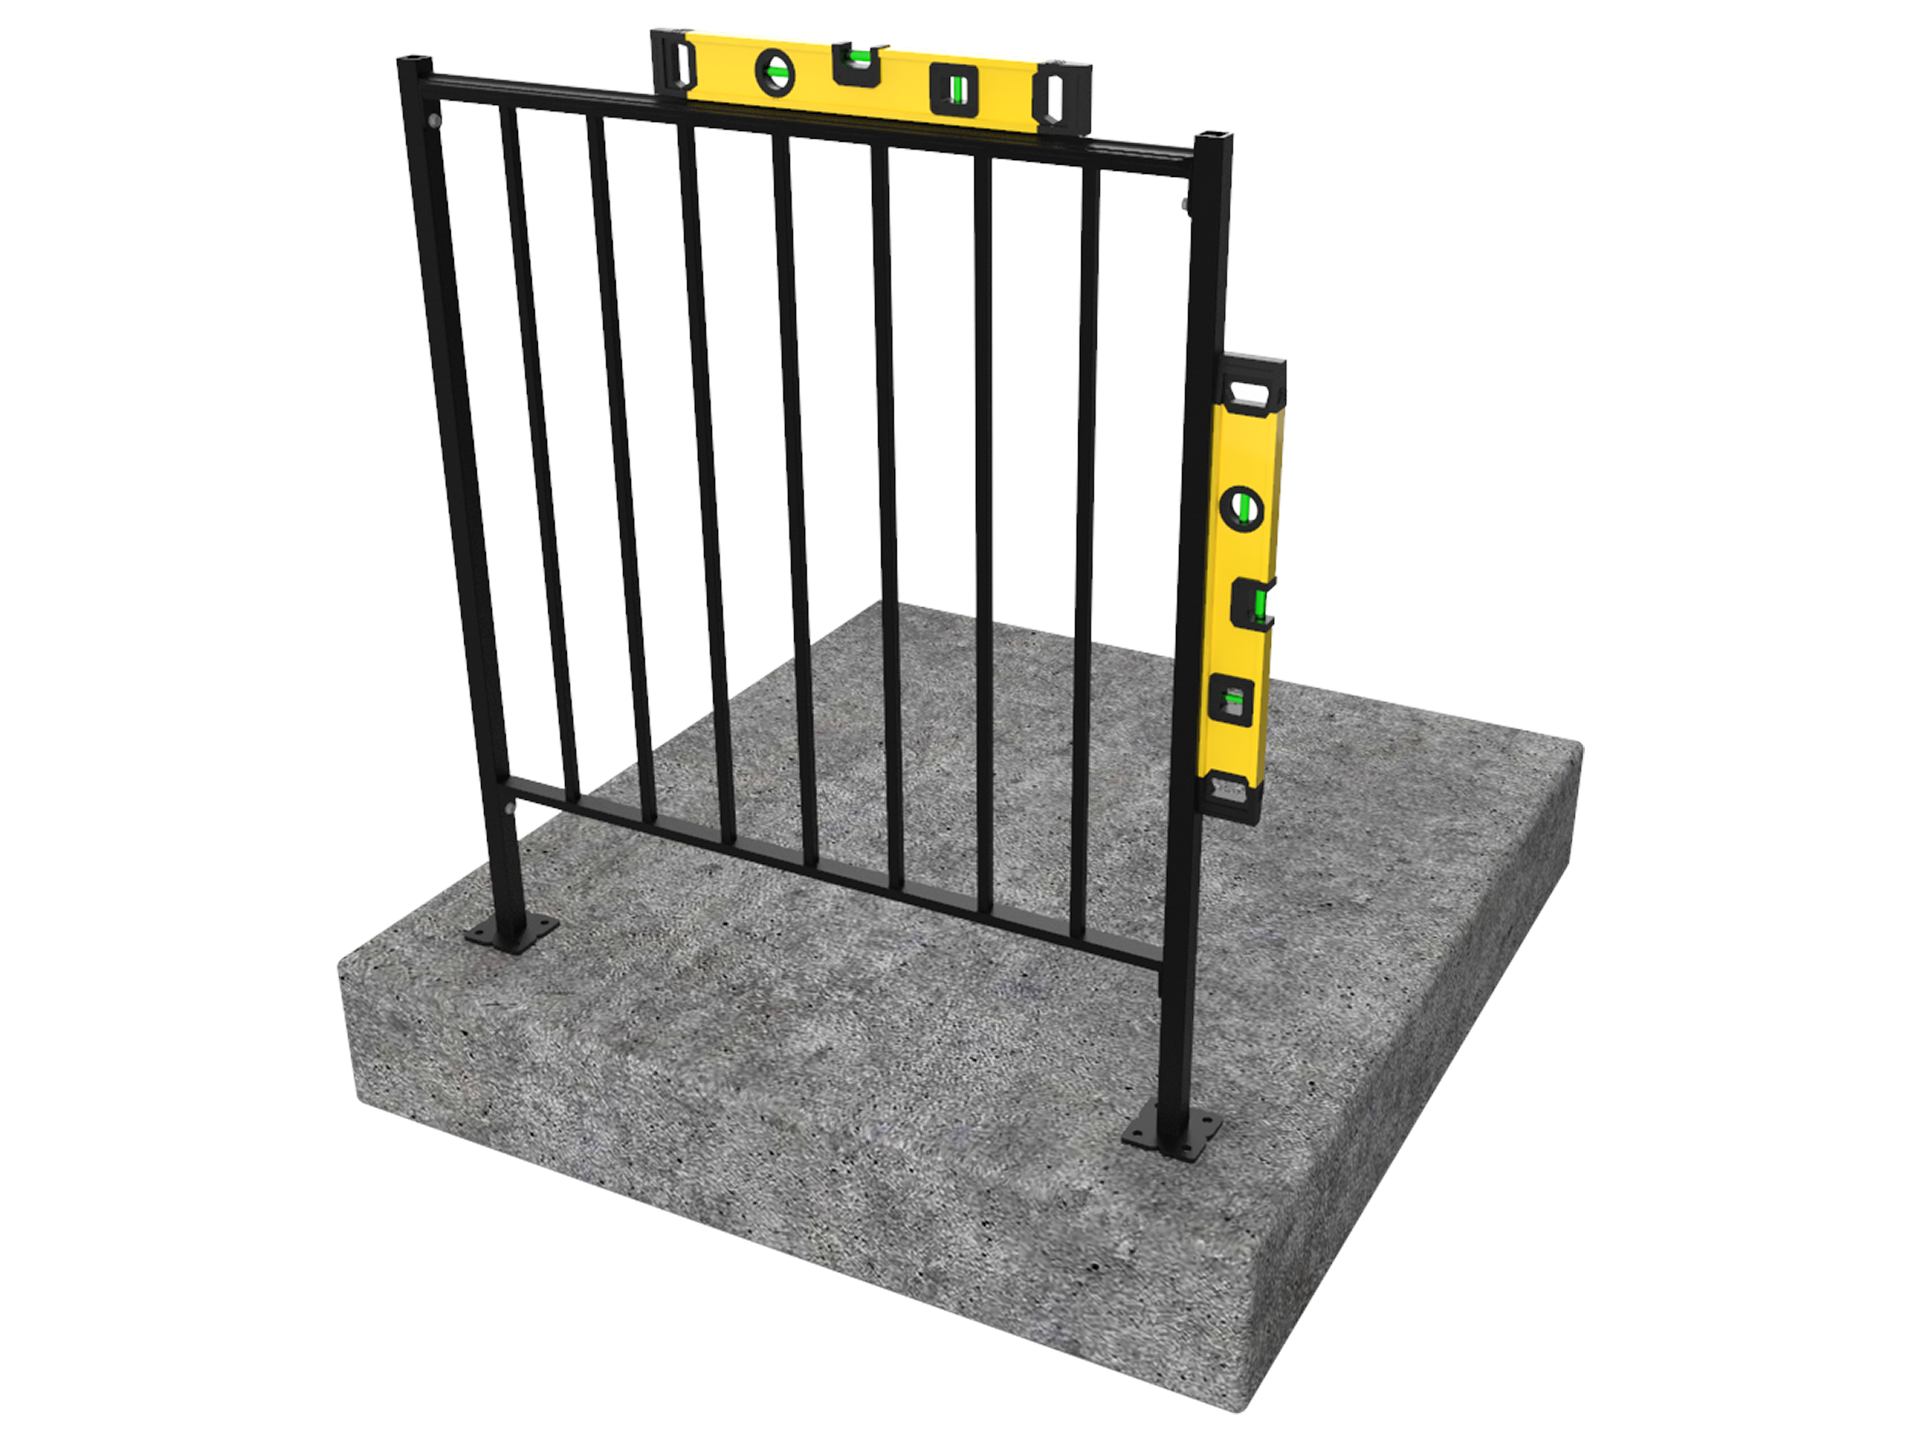
Use a level to check the rail is plumb and level in each direction.
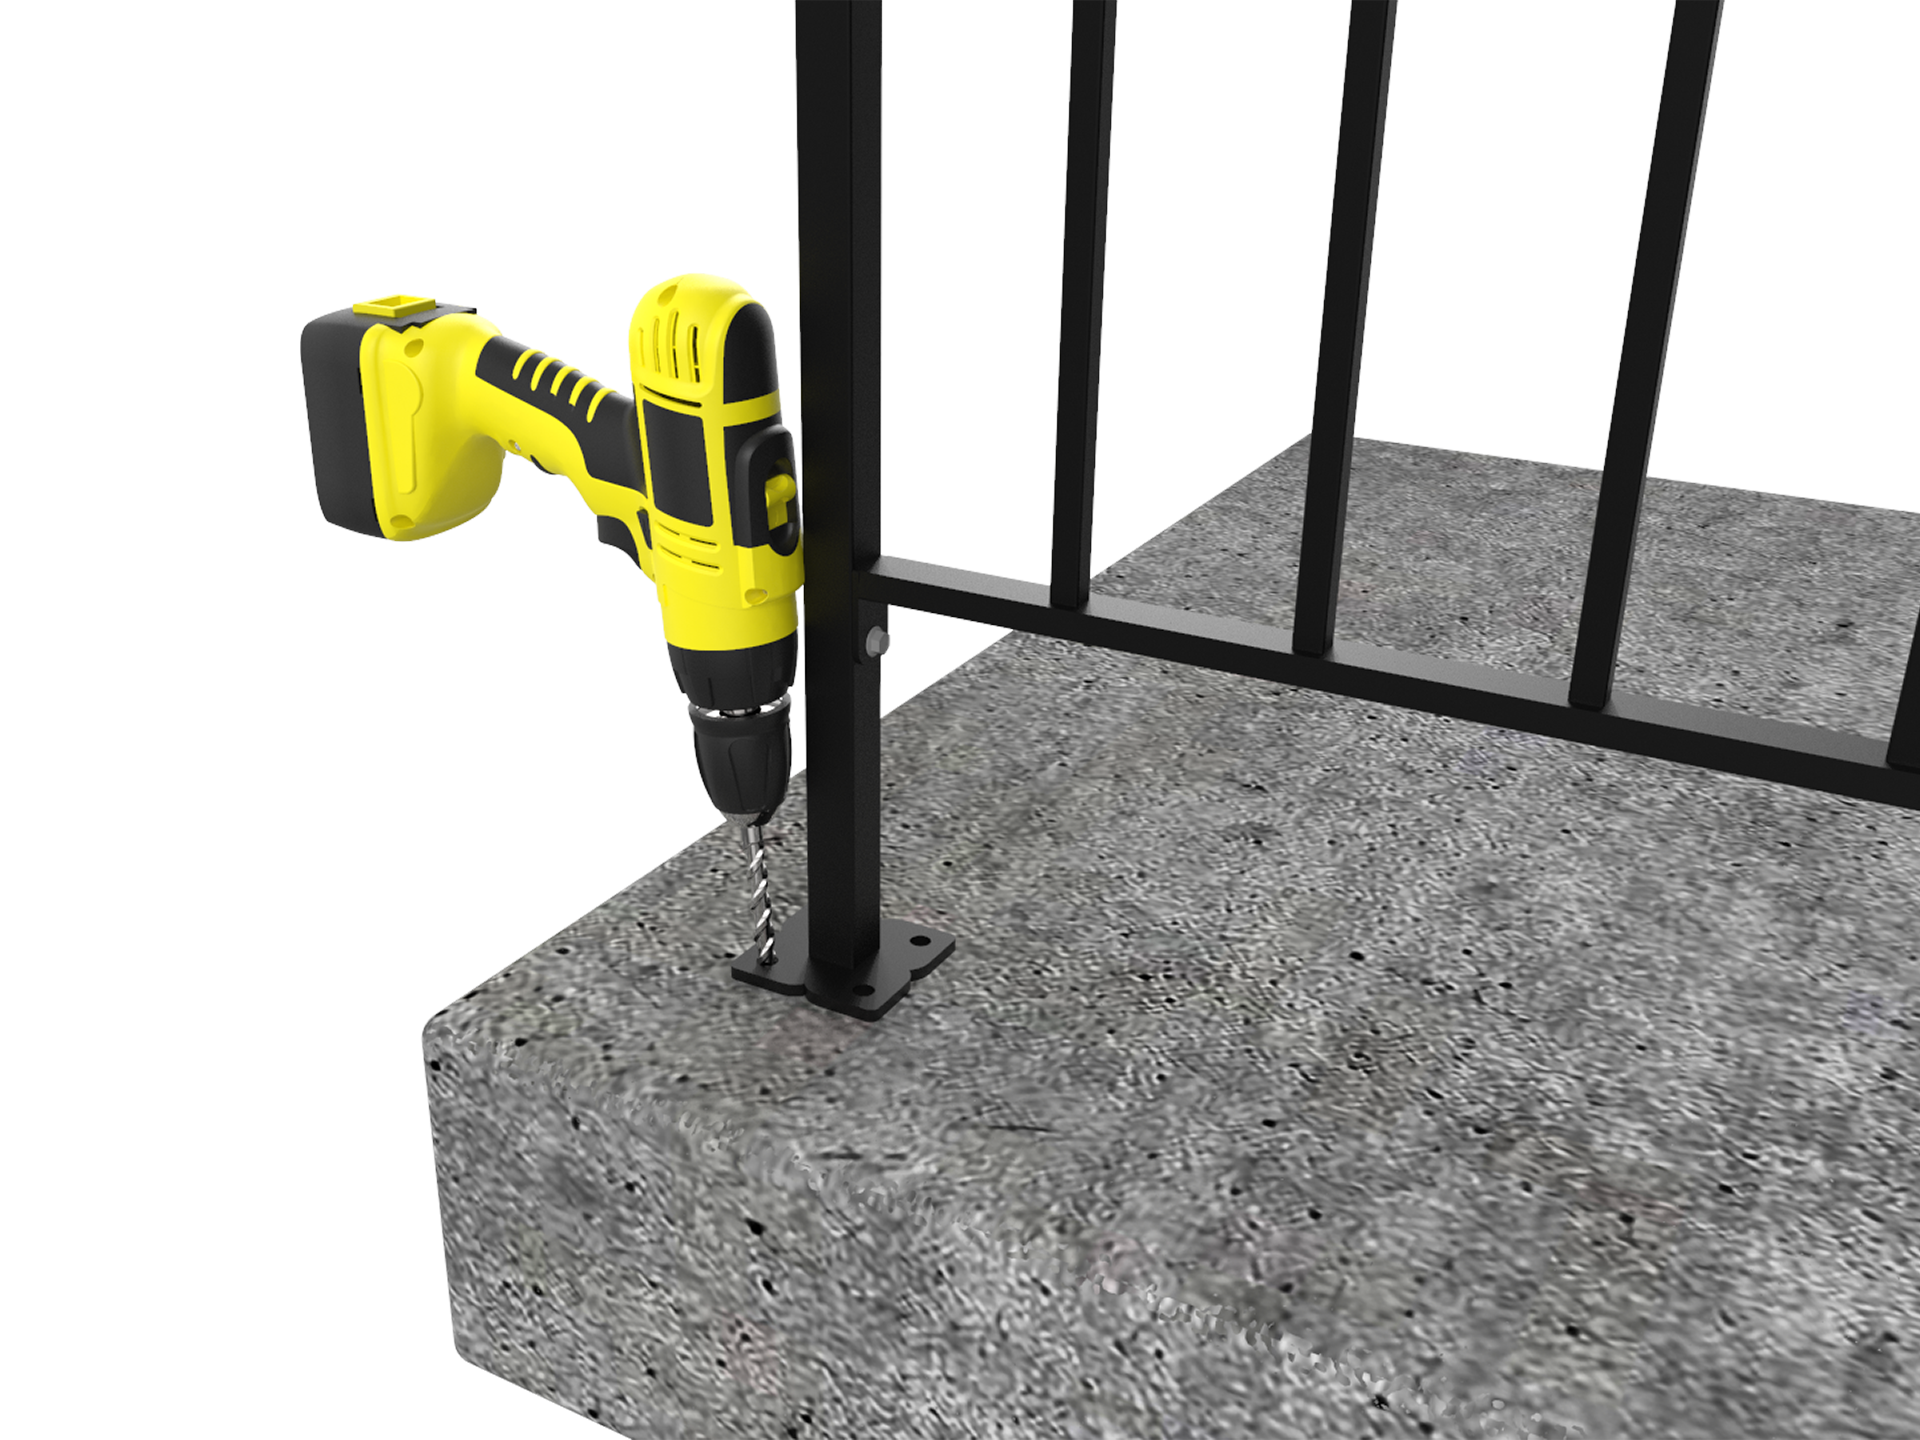
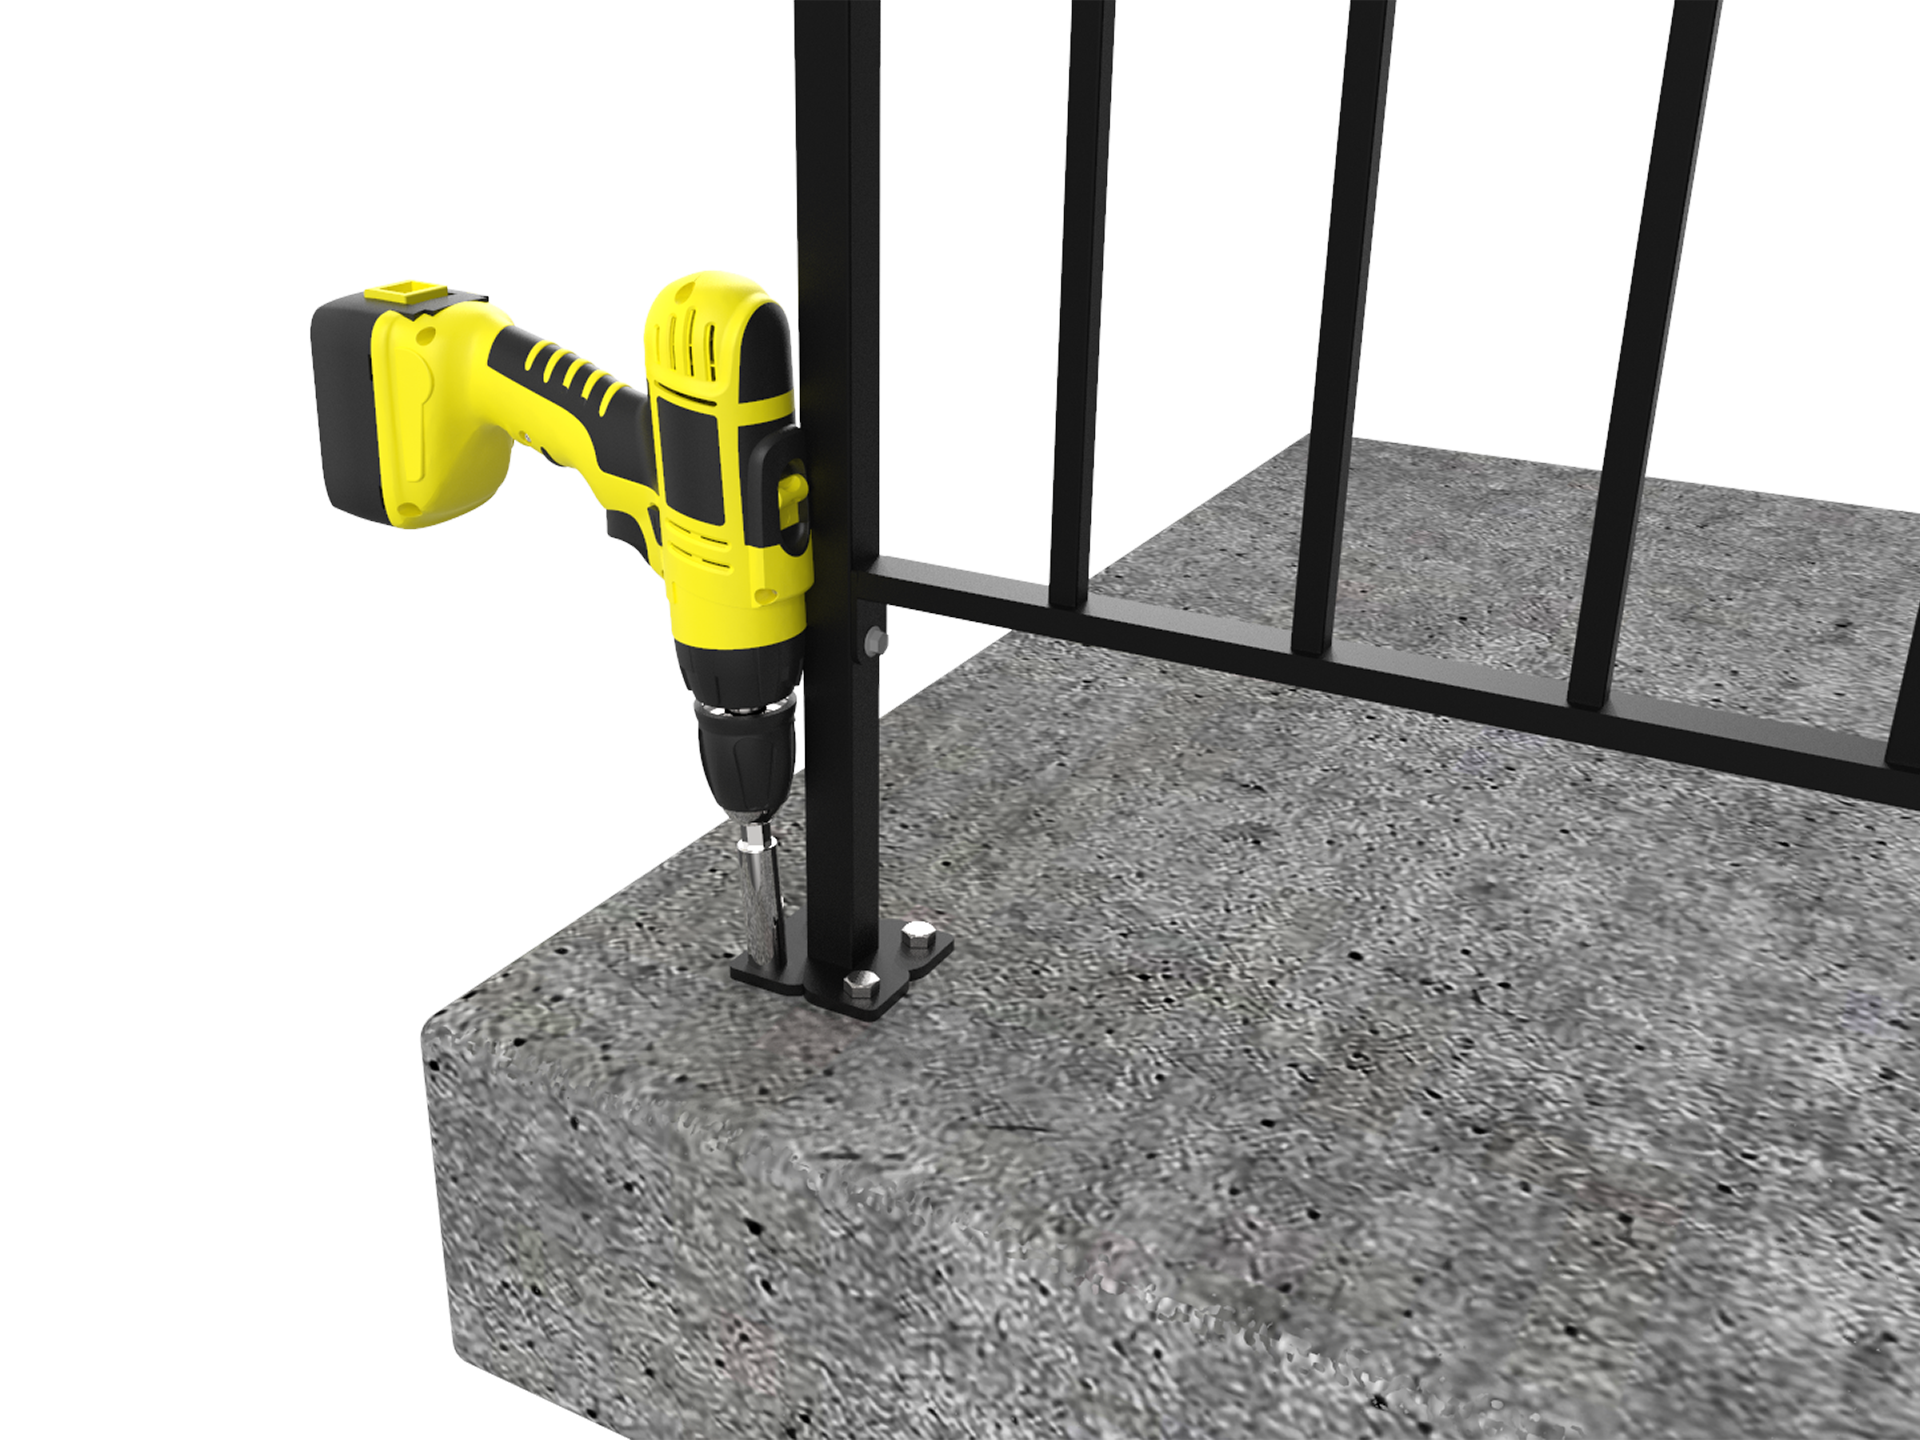
Using a drill fitted with the included drill bit, drill through one of the holes on the post mount. Ensure you are drilling deep enough to accommodate the length of your fastener. For concrete, drill 3” deep, and for brick drill 6” deep.
Select fasteners, appropriate for your platform material. Secure the fastener into the hole that you have just drilled. Be sure to drill one hole and secure one fastener at a time. If the post is no longer level after fastening, place the included washers under the post mounts until a level reads plumb.
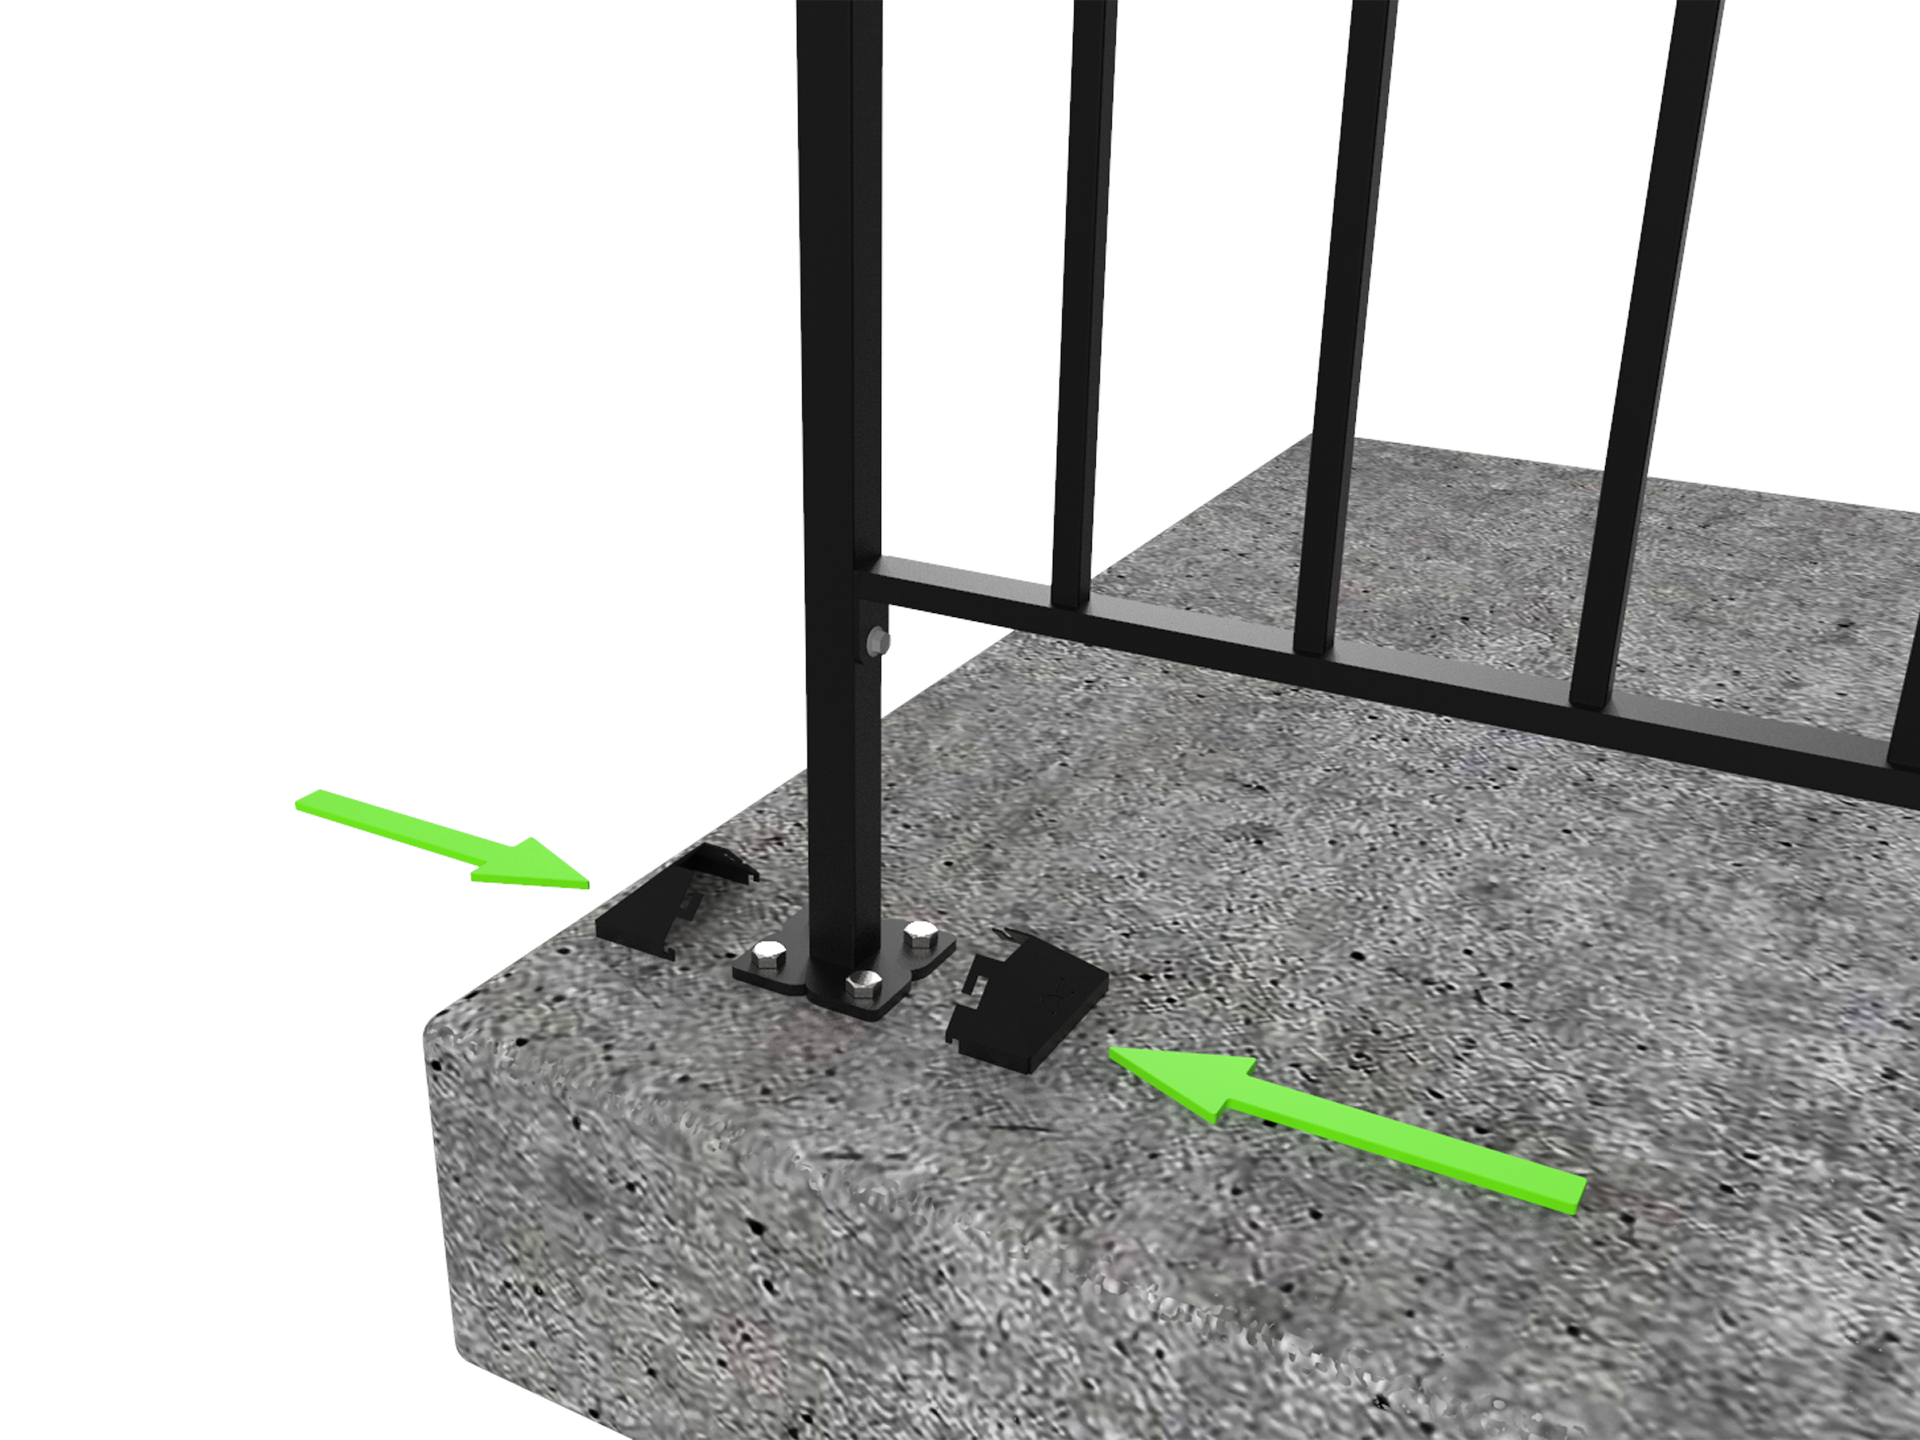
Install the stainless steel escutcheons over the post mount bracket plates
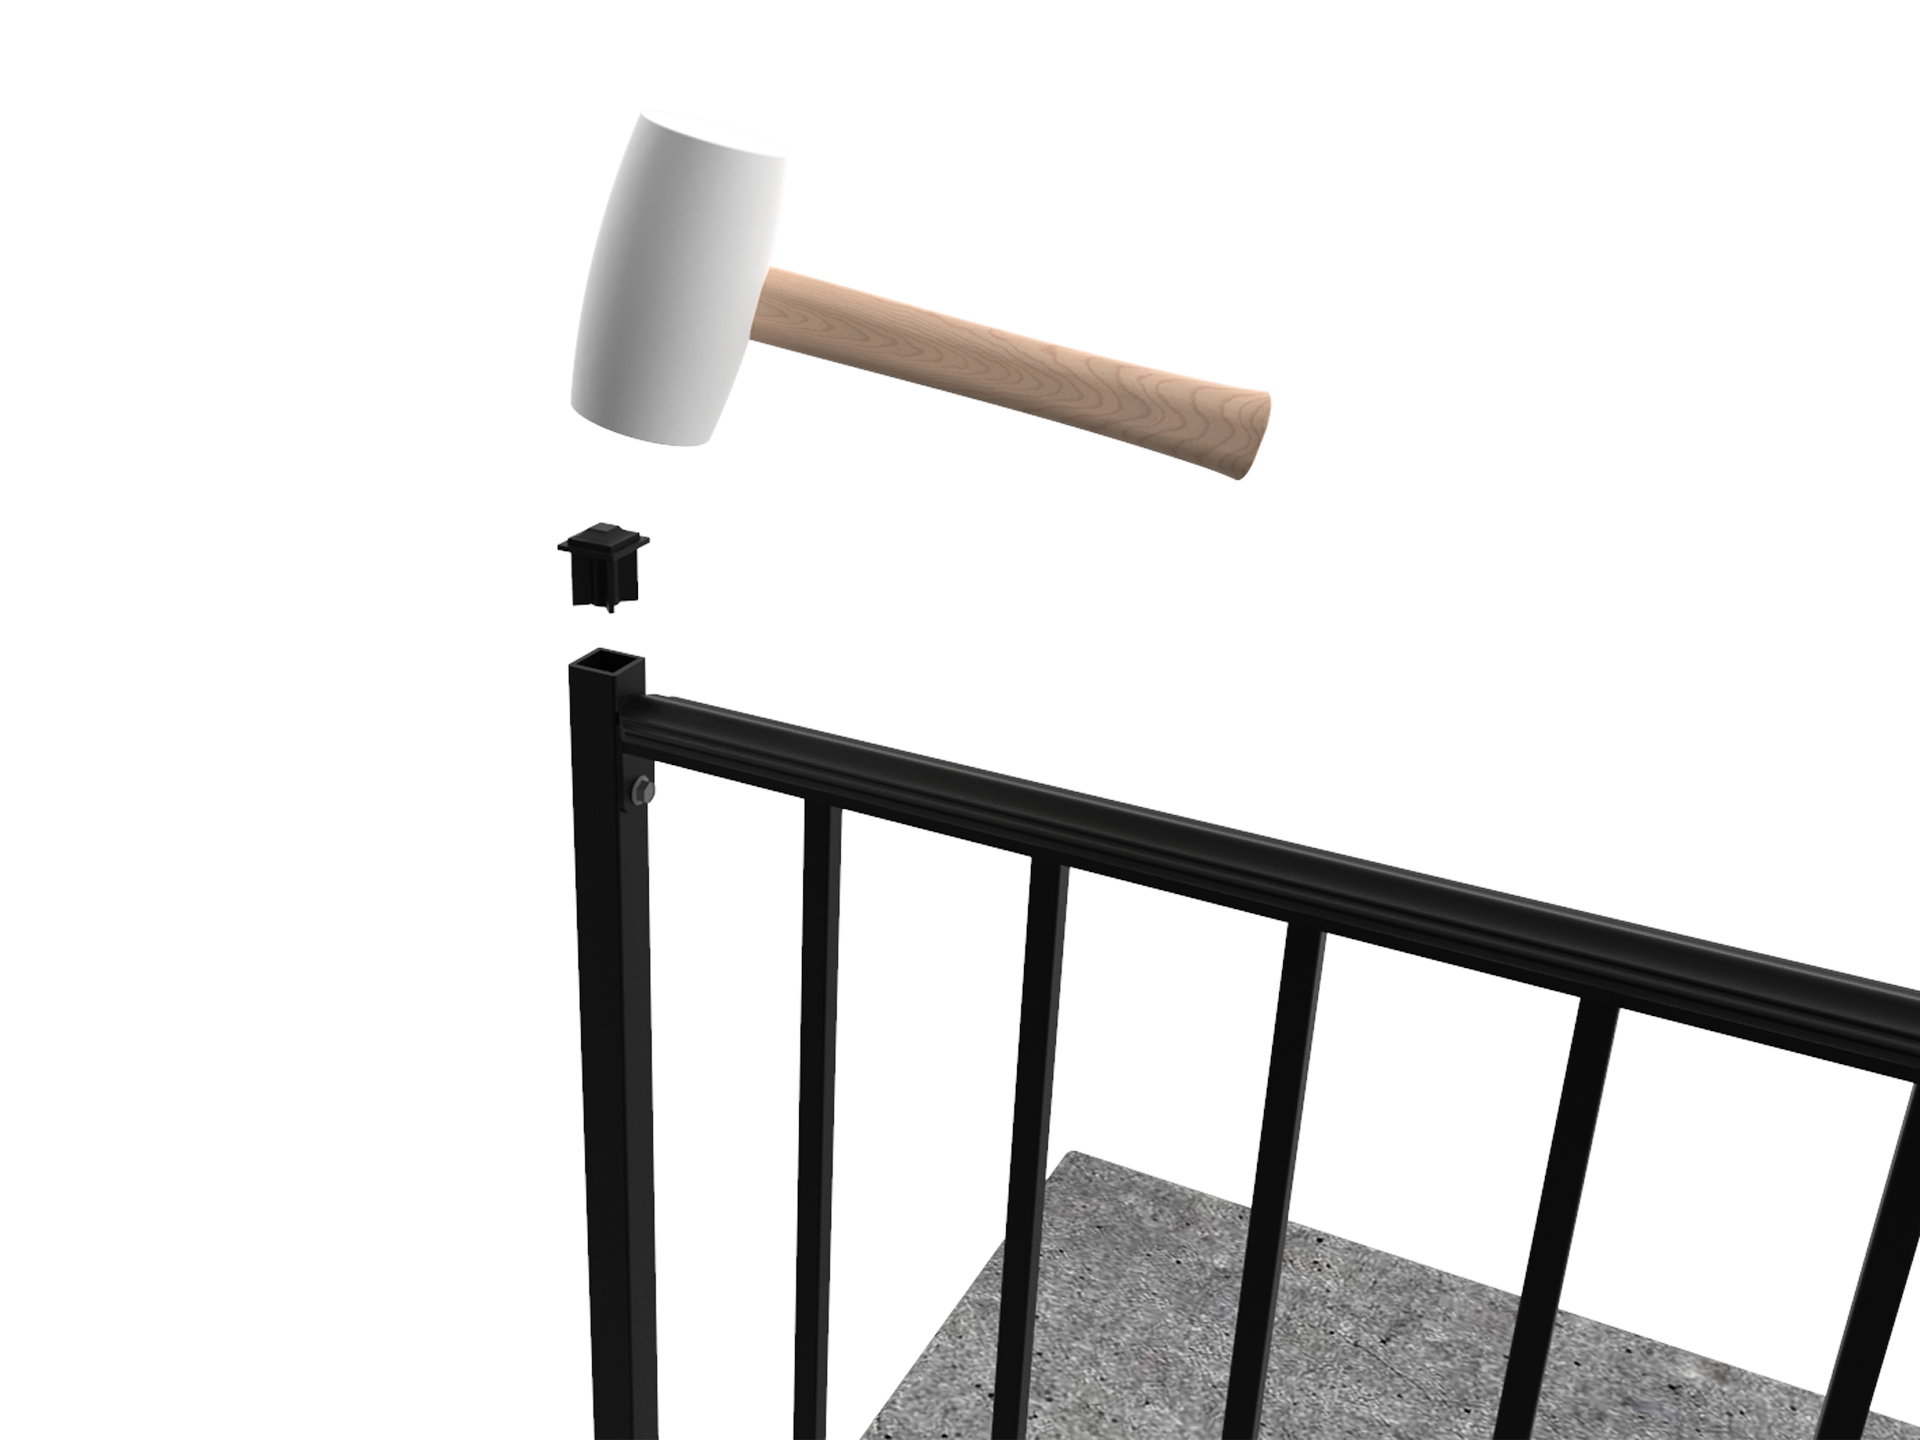
Install the newel post cap into the upper post top by gently tapping it in with a rubber mallet.

