Learn how to Install our DIY Wall Handrails
Here Are The Steps To Have A Quality Handrail Installed In About An Hour
DOWNLOAD OUR INSTALLATION GUIDES BELOW FOR A WIDE RANGE OF APPLICATIONS
Handrails Just for Steps
Stand alone handrails for stair mounted applications
Handrails for Steps and Porches
Combination of stair mounted and level mounted handrails
Wall and Floor Mounted Handrail
Typically used in garage stair entries
Wall Mounted Handrail
Ready to ship wall mounted handrails from 2 ft to 5 ft. Custom solutions available up to 180 inches
FOLLOW OUR EASY STEP-BY-STEP PROCESS TO INSTALL YOUR NEW HANDRAIL TODAY!
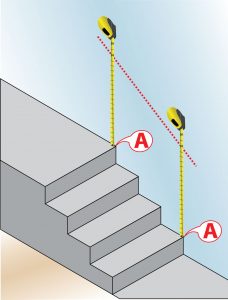
Determine your wall rail height. (typically 36”) Place a mark on the wall 32½“ (36”-3½“) up from the nose (A) of the step. Be sure to measure vertically from the nose of the first and last step.
Draw a straight line connecting the two marks.
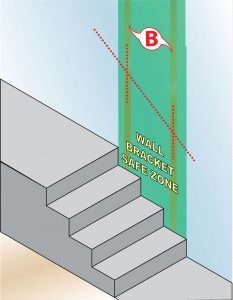
Locate the wall studs (B) and mark where they cross your line from step one. This is where your wall brackets will be mounted.
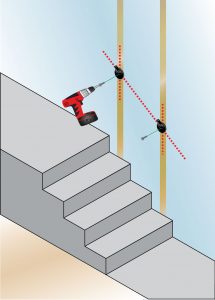
Install your brackets to the wall using an appropriate anchor. Tighten the wall anchors so the brackets are still able to rotate.
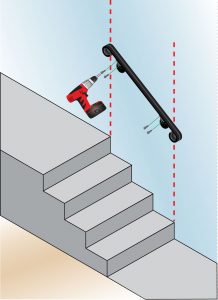
Place the handrail onto the wall brackets.
Using a high speed screw gun, run the supplied self-drilling screws through the wall bracket into the bottom of the handrail.


